
Human nature suggests that we buy with our eyes. As a result, the majority of the time spent online shopping means the decision to buy is typically made while viewing the product page. The quality of the product description, among other critical product details, factor heavily into the purchase decision as well, but the product images always stands out.
Given that we are visual creatures, there are many ways to present the visual aspect of your product but the images you use are the key to truly unlocking deeper revenue intelligence. Features such as zooming, scrolling through slides, 3D rotation etc. enhance the presentation to your audience.
Having spent so much of your time and resources designing and manufacturing your products, you owe it yourself & your team to make sure your hard work is showcased properly. However, the one thing Shopify does not provide or help with are how your product(s) is photographed, so you need to figure out how to create seamless product images for your Shopify store on your own. That’s where we come in!
Polished & professional looking product images can turn intent into completed purchases but if the images are treated as an afterthought & poorly done, product photos can also bury your business before it even begins.
In this post we’ll share 18 powerful tips on how to build effective eCommerce product images for your Shopify store, covering all you need to know in order to make your products stand out and get chosen more often.
But before we get into the tips, let’s first breakdown how quality photos affect sales
Over the last two decades, shoppers have been increasingly using the internet to make purchases, deviating away from the more traditional brick-and-mortar model. As a result, quality product images have proven to have a direct correlation with add-to-carts, conversion rates, return rates, checkout abandonment, average order values, repeat purchase behavior and many more vital eCommerce KPIs that affect customer loyalty and brand awareness.
For example:
- According to Shopify, 90% of online shoppers rely on product imagery when making a purchase decision.
- Shotfarm reports as much as 28% of abandoned carts happen due to missing or inaccurate product images.
- 57% of the consumers will abandon a cart if the wait time exceeds 3 seconds – page loading speed depends (a lot) on the size of the images as well as the file format they are saved in.
- Almost half – 46% – of the 2.4K respondents in a survey by Stanford Technology lab mentioned website design as the number one credibility factor. Needless to say, blurred product images will harm even the most pixel-perfect Shopify store.
- 78% of online shoppers – the highest percentage of all options, mentioned that quality product images rank as the most important factor during their eCommerce shopping experience. After all, this is logical: how else can your shoppers check out and appreciate your products, if not by looking at your product shots?

While the importance of the product description is missing from above, (Hint: It’s the second most compelling factor during the online shopping experience behind product images), the importance of high-quality product imagery in eCommerce cannot be understated! It is as much of an expectation nowadays, as a Wi-Fi connection is in a café:
Meaning if it’s there – you take it for granted. If it’s not – you get up and go, no matter how delicious the coffee might be.
Preparation for shooting is paramount

The product photoshoot is a mission brands have to plan thoroughly to reduce the cost. Everything about DIY photography/creating a studio is costly: the equipment, the studio rental, the talent, the post-production.
To get top results from lower costs – research and plan:
- A venue for the shoot: outdoor, indoor, rented or at your home, professional or hand-made. Decide on the best one for your needs and budgets.
- Equipment for your shoot: everything matters from the background choice, lighting, camera to the tripod. You don’t need to buy all that – renting may be an option, the pro equipment costs insane amounts of money that no starting business can afford.
- Talent – try to stay away from luxurious studios with pay-per-shooting time product photography pricing – you could shoot all day and not get the results you need. Plus there are costs for retouching.
With a smaller budget, sometimes the most effective strategy is to outsource the shooting on a price-per-image basis to a professional product photography company.
As an alternative – you could look for talented freelancers who are just starting – they may be available at a fraction of a usual product photography cost to fill their portfolio. Still be highly aware, there are some risks of rookie mistakes, of course.
- List of products to be shot. Have it categorized, think of the prep items needed after unpacking, sort them in order of the shoot.
The above is just an important portion of some of prep to remember when planning for a product photo session. It’s not an exhaustive list and it certainly takes some time but planning is essential for the success of the mission. If done well, planning can help the whole process go a long way towards keeping costs down. Do not neglect it!
Below are secrets we’ve uncovered over the years for showcasing great product photos for your Shopify store
1. After the initial planning phase, make sure you invest in a quality camera and lenses…or don’t!

It seems pretty obvious but this part gets botched often. Sometimes using the right equipment can get pretty pricey. It’s a common myth that the camera alone determines the quality of pictures. In reality, the camera is only one piece of the whole. An images’s quality is made up of a series of choices that incorporates lighting, exposure, styling, experience and post-processing/editing. Having said that, the camera and lenses you choose to work with certainly impact your final product so don’t completely forget about those!
The Nikon vs Canon debate can drive you nuts. Is an entry-level DSLR enough to accomplish the mission? Absolutely. But you don’t need a crazy full-frame DSLR camera system to get what you need either. While shooting images with a Nikon D810 (~$2,000) sporting a 105-mm f/1.4 lens ($740) is awesome, it’s also totally unnecessary.
Still, if you’re feeling excited and have the budget to stretch for a new camera system for this project, it’s worth looking into different options. If all you have is your smartphone, that’s OK too: check out this helpful guide to smartphone product photography.
So what’s the best camera for product photography? There’s no right or wrong answer so we actually recommend you simply start! Digest what the results are and make necessary tweaks from there.
2. Get the quality right

According to tests by eBay and requirements set by Amazon, here are some things that make a picture usable in selling; A full view of the product – The entire product must be present in the frame.
No additional features while you’re taking the picture – Do not place extra text, watermarks, symbols, etc. in the frame of the product image. Instead go for pure white backgrounds – The color surrounding the product within the frame should be white (RGB (255, 255, 255). However, we do strongly recommend adding trust badges to product images after they’ve been taken, touched up and published in order to allow them to stand out on your website and get chosen more often!
A professional look – This involves taking the picture in a neutral manner. Basically not trying to make it look cheeky, scary, or carry a particular voice or mood.
This is similar to keeping excessive smiling or frowning from a passport photo. The product must be well-lit, in focus, and looking real. The image shouldn’t contain supplementary objects, especially those with no clear connection to the product.
3. Choose a format
There are three major types of file formats for images: PNG, JPEG & GIF. Each of these provides its own level of quality. When dealing with a product that has many colors, consider the PNG (Portable Network Graphics) format.
This format has two types (PNG-8 and PNG-24) for more flexibility. PNG-8 allows for 256 different colors, producing a smaller file size. PNG-24 accommodates millions of colors and is preferable where quality is more important than size.
The JPEG/JPG (Joint Photographic Experts Group) format allows for the mixing of blue, red, and green light. With this option, you can also adjust the file size, but this will directly affect the picture quality.
GIF (Graphic Interchange Format) only allows 256 colors, but they are good for cases involving motion. Think of them as small, light videos.
4. Consider size
It’s important to have at least 1000 pixels of width or height, according to Amazon. Think of it this way: With a large image, you can create small copies when needed.
If you try enlarging a small image, you’ll quickly degrade its quality. Some studies also show that more white space can lead to more sales. With a large image, you can create different copies and run tests at the same time.
The attributes of the image that gets more conversions will help guide you on what sizes to go with.
5. Double check the camera is set up properly
You might want to turn off your flash settings and set the white balance to auto mode (AWB). ISO settings are best in the lowest available to reduce the noise – so ISO 100 should work fine.
6. Offer multiple angles

When it comes to taking product photos for your ecommerce website, there are some angles that work better than others. Offering different perspectives of your product to a shopper can also help answer any questions they have that your product descriptions don’t explain.
Considering 93% of shoppers use visual appearance as a key deciding factor when buying something online, you want to give as many different viewpoints as possible to highlight key features of your product. Come up with a number of shots to be taken. Make sure they are distinct from each other. Every shot should have something that isn’t available in another shot. Take the bottom, top, and sides. Sometimes an all-around view is more engaging and can help shoppers envision themselves wearing or using your product, which can lead to more sales in your store.
Where necessary, show parts of the interior. To display multiple angles in a friendly way, you need a theme that structures these options neatly. This may be using a slide strip or a whole separate button.
It’s also important to include close-up shots of your products as well. Close-ups let you capture features that showcase the quality of your product, including print detail, fabric, texture, or product usage, and highlight specific elements of your product that shoppers would want to inspect in a retail store. In fact, companies like Threekit are ushering in a completely new way for consumers to view products. 3D visual shopping experiences may be the game changer you were looking for!
Whether you’re shooting clothing photography or footwear, there are the five camera angles you should test in your photo shoot:
- Eye level. This view shows the product as you’d see it looking straight on.
- High angle.This view shows the product as if you’re looking down at it from an angle.
- Low angle. This view shows the product as if you’re looking up at it from the floor.
- Bird’s eye. This view shows the product as if you’re standing over it.
- Slanted. This view shows the product from one side.
7. A strong table set up using window light goes a long way

Shoot in a well-lit room. Natural light through a window is a great option versus a photo studio or artificial light. First, you probably have access to a window (and it’s free). Second, it comes from a single direction, which generates natural shows and adds texture to your products.
Consider the weather—is it sunny or cloudy? To get the look you’re going for, you may prefer a little overcast versus full sunlight. One of the main intricacies of the table set up near a window is placing it towards all the sources of light – be it a natural one or an artificial one, as well as making sure all the backgrounds and reflectors are placed in a way that is fixed and well-positioned towards the light and model.
Being placed closer to the window or a source of natural light is a good idea. The 2 things to take into account when doing this will be avoiding the shadows of the window frame and placing the table at an angle of 70-110 degrees relative to the window. Aim for 90 degrees to the right or left of your setup. Try to start your photoshoot at the brightest time of day. If it turns out that the sun is too bright, you can always use a diffuser sheet to soften the light.
8. If accessible, show available colors and styles
Some products come with various casings or finishing. An example that comes to mind is an external hard drive. One may have a glossy exterior, while another may be textured or even have a dull exterior.
Other categories include clothes and footwear. These tend to come in different colors. You need to be able to give the customer an idea of what the product looks like in the color they desire.
Where possible, you can display smaller, less pronounced images of the other styles and colors. In other cases, you may have to use a navigation menu or selector of sorts.
It’s important to have images for all product styles. Keep in mind, you need to get as close as you can to create a feeling of a brick and mortar shopping experience via product photos because shoppers can’t touch and feel your product via the internet. Take multiple shots at different angles with all possible layouts.
The more a user can feel the item, the bigger the understanding and connection are there to serve as stimuli for the purchase.
9. But don’t shy away from shooting your product photos on a white background either…
First off, it’s simply classy and will make your photos good to go not only for the Shopify store but also for Amazon and any other marketplace there you’re planning to sell your products on. Place your white backdrop behind your product to give your photographs a clean and consistent look and to eliminate distractions. You could use a white paper sweep, or buy poster board from your local drug store or art shop for cheap. You’ll also need a table to place your backdrop on.
Always keep your backdrop white. Why is this detail so important? A white backdrop reflects natural light onto the product and gives you an evenly lit photo. It also makes the editing process easier if you need to remove the background. A cream or off-white color will make editing and lighting difficult. Also, try to position your backdrop not only behind your product but underneath it as well.
Additionally, you compete for a user’s attention all the time. Even on your product page, your product images are competing with texts and buttons and videos – you don’t want to overcrowd it with too many colors & gradients and extras. Keep this whole process simple by maintaining a clean, white background.
10. Setting up white bounce boards or some type of broad reflector can really deliver strong results

Controlling the lighting is key when learning how to take product photos with any type of camera. Bounce boards help minimize strong shadows and create a more balanced lighting environment to bring out the finest details of your product. You might also consider buying a white bounce board made of foam on Amazon. A regular big white piece of paper or a professional bounce card can be used to reflect the light for best product photography results.
No matter what you choose to do, you may want to experiment with the setup to see how the reflector interacts with every subject.
11. Emphasize material and other details
Many products are made using parts of different materials that are put closely together. Due to color, lighting, and size, it may be hard to tell that a curtain rod has metal and rubber, or plastic and wood. Take up-close pictures of those parts, especially if they contribute to the product benefits.
This practice also comes in handy when dealing with synthetic versions of certain materials like leather and fur. While artificial versions may look very similar, an up-close of the original material can still sway a customer.
Just like some people believe they can know certain things are fake without UV light showing security marks, the same goes for products. Up-close images showing details are good for complex products like electronics.
Customers are able to see the presence of small switches, cooling vents, types of ports/inputs, etc.
12. Give context
In many instances, customers shop for products with some sort of comparison or question in mind. They may want to know, how big a gadget is in their hand or pocket, how low a bag hangs etc.
Especially for products where sizes aren’t commonly noted. There just aren’t as many people aware of their phone’s thickness as those who know their shoe size. Start by showing the main product image with a white background.
It’s helpful then to show other images of the product placed in space, next to a door, chair, or table. In the end, sometimes it’s most effective to show products held by an actual human being because it offers a sense of size and scale. Think of a microwave on a countertop or a television on a stand. Envisioning how the product fits within its surroundings can be compelling to potential buyers.
13. Enable zooming

You likely won’t be able to take up-close images of every square inch of a product. And in any case, that would be exhausting for the customer to go through and keep track of. Enable the customer to zoom into/enlarge different images.
This option is important for products that have a lot of detail. With certain designer bags, shoes, jewelry and other items, things like stitching are important. Not only do they contribute to the overall style, but they also help tell a fake from an original.
The zoom can also come in handy for people with short-sightedness if their glasses aren’t nearby.
14. Invest in a tripod

Tripods are a phenomenal investment in the quality of your eCommerce future. And for 20-30$ on Amazon no less!
When capturing your product photos, you’re likely going to set your camera to a very small aperture to ensure you have the most depth of field you can get.
The width of the depth of field defines the area of sharp focus, and to get to that you need the largest f-stop number your camera can obtain. Shutter speed and f-stop are related, and since a larger f-stop number like f/8 lets in less light, you’ll need to counter that by using a slower shutter speed to allow more light through.
When a camera has a slow shutter, you can’t hand-hold it or the subject will be blurry—so a tripod is your answer. If you’re interested in learning more about the fundamentals of photography, check out this video. Most point-and-shoots may not allow you to choose your f-stop and that’s fine, but there are ways to get around this.
Think of using a tripod for 2 major reasons:
1. To ensure consistency of the series of images – you won’t be able to hold the camera in the exact same position for a series of few shots, let alone for a series of dozens or even hundreds of shots.
2. To avoid the blurry effect, that is highly likely to appear when hand-holding a camera, on the slow shutter speed.
And if you want to avoid most of these mistakes, hiring a more seasoned professional to help you is always an option as well.
15. Avoid using filters
As you are trying to get the most true-to-life version of the product in your picture, using filters is not the best idea. That’s not to say the pictures can’t be touched up using professional Adobe products or anything, just try to stay away from filters that can make your products look disingenuous.
When you’re displaying your products on social media, that’s more of an appropriate time to add filters depending on the aesthetic you’re going for.
16. Try dynamic viewing
Some shoppers don’t like to keep scrolling and zooming. Consider using a GIF or video in which the product is rotating 360 degrees. You can also give an option to zoom in further or “View Slideshow”.
Doing this provides customers the option to periodically change to a different angle when viewing your product. The advantage to doing this offers extra aspects to catch the shopper’s attention. If your slideshow is a little fast, this isn’t necessarily a problem.
Some viewers will attempt to click the back arrow and interrupt it. But when you flash something attractive in front of someone’s eyes and quickly take it away, they may be more triggered to get a longer look.
17. Use a ‘marco’ setting for finer visual nuances
The smaller the object, the more likely a photographer is to take a macro photo of it.
And, the more expensive the product, the more likely a photographer is to take a macro photo of it.
Fine jewelry falls into this category. Jewelry product photography is all about macro shots. If you are shooting luxury items in general, shoppers are more likely to zoom in on stitching and small details so it’s paramount your photography showcases quality in high resolution.
18. Consider adding a flash diffuser
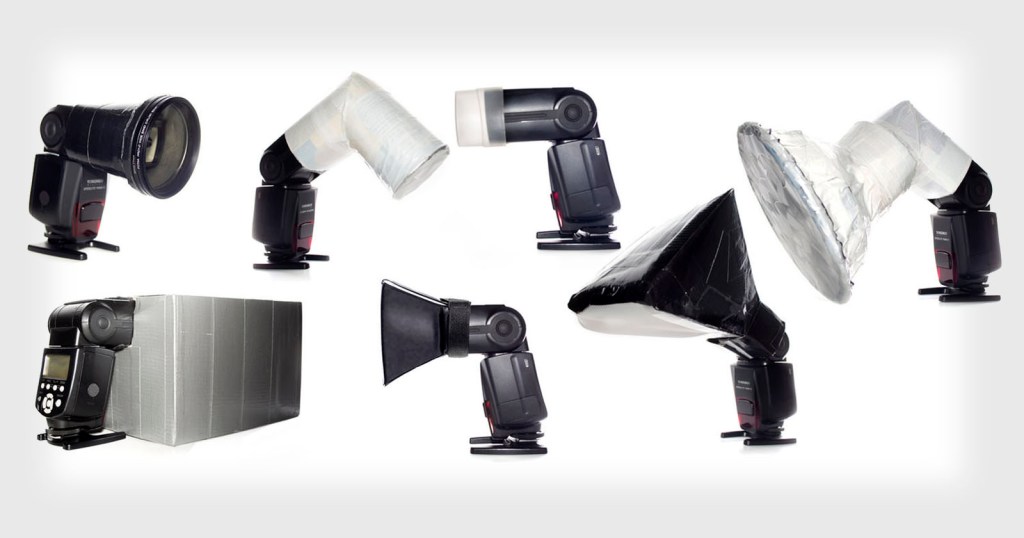
One of the pieces of equipment your brand may be considering for your product photography sessions is a diffuser because it adds a lot of level to the lighting.
When the lighting is too harsh, these sheets will soften the light and make it less concentrated. You can find diffuser sheets on Amazon or DIY one at home with parchment paper, a frosted shower curtain, or printer paper.
19. Growth loop: Display user generated content to your customers

While your product images should appear professional and on brand, you can also include pictures from previous buyers as well. In fact, sometimes those are the most professional looking product photos and the most on brand!
This strategy instills confidence in the customer since they can see that a number of people have bought the product. UGC (user generated content) has been a massively effective strategy for brands over the last decade because it offers social proof. People are always attracted to products that they see other people using, especially in glammed up social media types of ways. For example, a sofa may look a bit dull on its own. But when a verified buyer posts a super photogenic picture with multicolored pillows/cushions in a trendy way, it can go viral and encourage other shoppers to decorate their couch in a similar way.
Product reviews are also incredibly effective. Like UGC, product reviews often inspire others to take action. In our experience, trust badges in UGC and product reviews can help drive repeat purchase behavior. And if done properly, recommended products bundles together in strategic ways can increase average order values per user as well!
20. Step up your game by involving influencers
Influencer marketing involves collaborating with popular and relevant influencers in your niche to promote your brand because it can help increase your value and hopefully, translate community affinity into gains towards your bottom line revenue.
Influencer marketing can help your brand achieve:
- Amplified awareness
- Precise audience targeting
- Enhanced credibility & trust
- Increased audience engagement
- Improved search engine rankings
- A boost in sales conversions
Influencers are characterized by a large number of loyal and dedicated social media followers. They are perceived as experts in their niches and their recommendations are often highly regarded by their followers.
What distinguishes influencers from traditional celebrities is that the former share a strong rapport with their fan communities. They harness the accessibility of social media to establish personal connections with and gain the trust of their followers.
Influencers are often real-life consumers who have in-depth knowledge about certain subjects. This gives them certain leverage and empowers them to motivate their followers to take desired actions your brand might otherwise have to pay a hefty price for using alternative methods.
Depending on your marketing objective, you can work with influencers to create engaging content, announce giveaways, host Q & A sessions, etc.
A successful influencer marketing campaign requires solid planning and a deep understanding of your target audience and marketing objectives.
For example, if your brand sells high end china or glass sets being used by a family, make sure you work with influential tastemakers within that space so you can authentically appeal to high intent shoppers for better results. It’s important to make sure you select influencers or models that look similar to the people you’re trying to sell to.
21. Manage the file size
Optimizing images for your website cannot be overlooked. Search engine optimization (SEO) is crucial for all online sellers. One thing that is important is the load speed of your ecommerce website, and large images can really be a burden on this. There is a delicate balance between image quality and optimization, because if you over optimize, it destroys the image. As a rule of thumb, try to make your images no larger than 200 kilobytes.
High-resolution images tend to have a larger file size. This can lengthen the loading speed of the pages on which they are posted. Start by rendering/exporting your raw copies to a resolution that isn’t higher than what you need. If 1080 x 1080p is enough, don’t upload images that are 6000 x 4000p.
The next step is to create smaller copies for your mobile website. Additionally, there are options available to use plug-ins like WP Rocket for WordPress, or their equivalents for other platforms. These combine HTML, JavaScript, and CSS files, reducing the background tasks on your website. This will help to improve your page load time.
22. Edit and retouch your images

Regardless of how much prep went into your product photography session, how clean & spotless your products are, how great the lighting on your set is or how sharp the focus of your equipment might be, you still need to touch up your resulting images. And yes, by doing everything by the book during the session itself, you absolutely can minimize the expensive retouching part significantly.
But once you’ve got a final image you’re happy with, it’s time to get it retouched. If you photographed your product correctly, the product should be exposed properly and your background a light gray.
The retouching tasks associated with on-white photography can be tricky for someone without a lot of training, and tend to be the weak link for most people trying to photograph products themselves. So, instead of trying to teach you advanced Photoshop, we recommend outsourcing it.
You’d be surprised how affordable this can be. From around $3 to $5 an image, you can have a professional retouching company improve your images for you.
Finding a good company can be tough, but one company that works well for consumers is Pixelz. Its software allows you to upload and manage your retouching from start to finish. Pricing starts at $1.45 per image, with a $25 minimum, but you get three free test photos.
23. Select proper thumbnails
Thumbnails are important in view cases where you’re not actually on the product’s page. This may be a section like “frequently bought together”, “related products” or a full-on category page.
The product is going to appear much smaller. Ensure you select the image which has the most clarity when it comes to details. Try the main front or top views.
Avoid using angles that leave out a lot of details or make it harder to know what product it is. Here’s how to change thumbnails for media on a Shopify store’s product pages.
24. Be consistent with branding
First, look at your page features and make sure that the kind of images you’re producing will blend in well. This is especially important for the less neutral images like those submitted by buyers and other context images.
Second, take note of the style you used for each product. The light settings, angles, coloring, and other post-production editing. Store these presets. When you have new listings, keep their style consistent with the one used across a category.
If you have a signature style that is used throughout the store, try to stick to it for most products.
Even slight changes in brightness or contrast may be subconsciously noticed by the viewer which can affect perception. Try to come up with different styles and standards for various product categories.
For instance, the way you shoot women’s clothes is likely different from the way you shoot power tools. Understanding these differences involves doing research & analysis on cohorts of customers. Find out what colors produce particular feelings within target audiences and take advantage of those nuances.
If you’re dealing with a niche product, educate yourself on the culture amongst its fans. For example, gothic wear shouldn’t give off the same upbeat vibe as a summer sundress.
Closing thoughts
There are three major areas to focus on when building the best product images. The first is production. This is mainly about planning your shots, organizing the photoshoot, and sourcing the right talent. Equipment, photographers, environment, lighting engineers, influencers, models, etc.
The second part is the store’s technology. Not only do you need a build on a great platform like Shopify and pick a great theme, but you should probably also invest in adding some apps as well. Trust badges, for instance, can help enhance the credibility of your brand instantly while simultaneously helping your brand boost sales conversions! While you’re at it, optimizing your product images for better search rankings can’t hurt!
The third are your customers. Use your website data and other sources to learn as much about them as possible. Categorize them according to any number of metrics that drive the revenue needle forward like location, age, buying history or other attributes. Once you have a better understanding of their preferences, use them to guide you during photography.
When you check all these boxes, your product pages will drive higher quality traffic easier and in larger numbers. And if you’re really doing it right, you’ll keep your customers buying from you over and over again.


